Rasam. An ole favourite.

Anywhere in India you go, there is one part of the cuisine that is a broth or refreshment that is tangy, pungent, fragrant and is created with perhaps the sole purpose of getting us to breathe deeply and expressing a warmly satisfied sigh. I count the masala nimbu soda as one such. And I had sworn once that if I could get ‘kanji’ to drink every evening, then I would give up alcohol in favor of that rye & carrot fermentation.

Rasam. Another one in that list of liquids.

A couple of months ago, I had noticed some Rasam recipes in good food and had’nt really paid heed. Then some weeks ago, out of boredom, I tried one out – and hey! Surprisingly good results. Today, I heard the maid complain of some extra Rasam powder that had been delivered; so I read that as a sign and started out again.

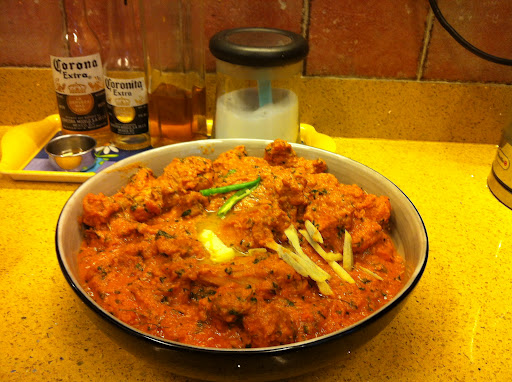
Wonderful result!! And this took about 15 minutes and 1 pint of Kingfisher.

What I had to get together quickly

3 ripe tomatoes | blanched, peeled and pureed in a blender

1 tsp cumin powder

1 tsp mustard seeds

1 tsp asafoetida (hing)

1 tsp turmeric (haldi)

salt to taste

12 leaves of curry patta

1 green chilly | broken into 2 or 3 pieces

4 pods of garlic | grated

A packet of Rasam Powder |  easily available at most stores, but also quite easy to assemble

4-5 cups of water | in which I had blanched the tomatoes

2 nice large balls of tamarind | soaked in warm water, squeezed & drained to give you a cup of tamarind pulp/water.

And away we go.

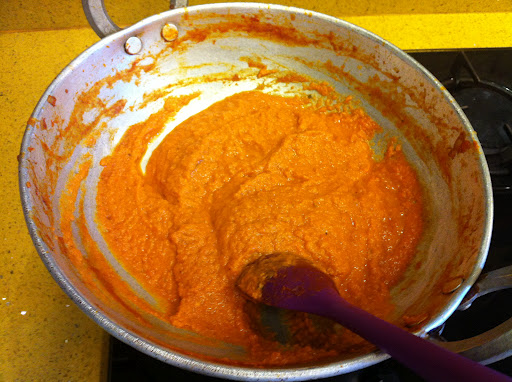
Take a deep pan, heat a couple of teaspoons of oil, and gently fry the mustard seeds, cumin powder and garlic together. Add the curry patta & green chilly and fry the leaves a bit as the fragrance develops. Immediately after, put in the pureed tomatoes, the tamarind water, the haldi and the hing. Let this cook and boil over for 3-5 minutes. When the puree & masalas looks well cooked and some oil’s separated, add 3 tbsp of the rasam powder.

Once everything is well blended, add the water and salt to taste and let boil for a few minutes.

Serve as in an earthen mug, or with rice. I love it both ways and usually end up doing a couple of cups of Rasam each way!

If you love Rasam as much as I do, you will end up finding out more about it; and it may surp you as it did me that there is quite an amazing variety of rasam’s you can make. The basic tenets of jaw dropping spiciness, fragrance and watery texture remain the same of course, but tomatoes, coconut milk, toor dal, dry red chillies, pepper and their many combinations can create some wonderful variations.

This variation above I can call my own. I read a bit, and picked from Good Food of course, but made many amendments of my own. This exact dal-less version is the one I like the most. Um. OK – So far.

My home-style veg lasagna.

Again. Feel like a bit of an idiot not having taken snaps of the finished lasagna. This is the best work-in-progress shot I got!

I cant recall why I made this. It was a few weeks ago, and I recall there were many people getting over on a Sunday afternoon for beer and pasta. I remember my kitchen being a very very warm and busy place that morning. On the menu was this veg lasagna, a bolognaise lasagna, the roast veg (posted just before), garlic bread, and some spaghetti with the same meat sauce. This was the early part of the day – the kitchen is still neat-ish


The meat sauce is one that I have been working on for many years now, and its become a favourite for both the girls, and for many of their friends that drop in unexpectedly! But more on that one in a separate piece later.

The veg lasagna is one with tomatoes and roast aubergines & yellow courgettes.

Let’s get started by getting this stuff together.

Lasagna sheets – cooked as per pack instructions. For a bowl the size above (serves 3), you would need about 8 sheets on the outside.
A couple of tomatoes – sliced thick
An aubergine – sliced thin (say 5mm pieces)
A yellow courgette – sliced similarly.
Salt & pepper to taste
Olive oil
Ricotta (or cheddar) cheese. Better ricotta than cheddar honestly!
Some grated mozzarella – good if you can grab some of the fresh, watery one. Else stay with the frozen one you buy for your home pizzas.
A couple of eggs
Shredded basil leaves.
Some cinnamon powder (optional)
Dry crushed basil 
Some grated parmesan cheese
And an oven – you’d want this pre-heated to 180° celsius.

Start off by seasoning the sliced aubergine and courgette with salt and pepper, and then (in very little olive oil) almost dry roasting these till they are nicely browned and cooked. I use a standard roasting pan with the striations in it – that gives the veggies that nice burnt look.

And by now of course, you should have cooked the lasagna sheets as well. And sliced the tomatoes.

Get hold of another bowl and break the eggs into it. Spoon in 4 or 5 tbsp of the ricotta, the mozzarella (4-5 tbsp), a couple of spoons of milk and salt & pepper. Whisk all this together with a whisk or fork..

Get started on the assembly now and get a deep oven-safe dish – say about 4 or 5″ deep. Start at the bottom with sliced tomatoes, sprinkle with salt & pepper & basil powder and some basil leaves. Next line up some of the sliced aubergines and then the sliced courgettes (or vice versa really). Finally line up the pasta sheets on top of the veggies. On top of the pasta sheets, liberally scoop in the egg and cheese blend. And that completes one layer.

Simply repeat a couple of times till you’re almost at the surface of the dish. Make sure you finish with the egg/cheese blend. Your final surface will be a generous sprinkling of the grated parmesan.

Cover the dish with foil. 
Bake covered for 30 minutes. Remove the foil and bake uncovered for another 6-8 minutes or till you have a nice brown top that looks heavenly!

Serve out! Garlic bread’s a must, and the roast veggies will go nicely as well!


Butter Chicken. The most fun I have in the kitchen.

If it wasn’t for the move from Delhi to Bombay in 2006, this recipe would never have become part of my repertoire. In fact, and some may argue this, just the sheer lack of width of dining choices in Bombay (at least the parts we lived and roamed in), meant that one had to improvise in one’s own kitchen.


For the record, in Bombay, the only butter chicken that’s passed our taste-test was at the Copper Chimney. And amongst the best butter chicken you will ever have is at the Taj Holiday Village coffee shop (in goa). Discovered that a few weeks ago, and rue the fact that I did not go talk to the chef to find out more.


There are as many BC recipes as there are Indian cookbooks. The book I used many years ago is no longer in print (The Complete Indian Cookbook – Vimla Patil). Broadly though, some books prep this as a single dish and others as a two-stage dish… needing one to roast the chicken (good old tandoori chicken), and then amalgamate this with the curry. 


This is a slightly complicated dish – at least compared to other food that I work on in my kitchen. It has a couple of stages, need marination time, and needs a blender and oven. 


If you get tandoori chicken around you that you really like, that’s one way to sidestep one part. Just ignore the ‘roasting’ bit and go straight to the curry and onwards.


Get together the ingredients and let’s get started.


One chicken, cut into curry size pieces. Make some deep cuts in the chicken with a sharp knife
1 tbsp oil for the marinade
Curd – half a cup for marinade, half a cup for the curry
Garlic – 6 pods for the marinade (minced), 4 pods chopped fine for the curry
Ginger – 1″ piece for the marinade(minced), 1″ chopped for the curry
Salt – 1/2 a tsp for each but pls adjust as per your taste
Zeera (Cumin) powder – 1tsp for the marinade
Chilly powder – 1 tsp each for the marinade and curry
Turmeric – less than 1/s a tsp, only in the marinade 
Dhania (Coriander)powder – 1 tsp each for the marinade and 1.5 for the curry
Garam masala – 1tsp
3 tbsp oil (I use olive)
3 onions – diced small
3 tomatoes – blanched, peeled and roughly diced
Tomato puree – 2 tbsp
Sugar – 1tsp
Vinegar – 1tsp
Kasuri Methi (Febugreek) – a fistful
2 Green Chillies, whole; slit through the middle.
Oh, oops. Here’s the wonderful thing, I actually don’t use butter. But if you want this richer, then about 50gms of butter can be added to the oil in the curry and about 3tbsp of cream (easy now, Amul has 200gm tetra packs)


STEP 1 :: Marinade and Roast the chicken!


So, get your oil and cup of curd, beat it lightly and blend in all the spices as well as the minced garlic and ginger. Rub this marinade all over your chicken, cover the dish and leave inside your refrigerator for 2 to 3 hours. (Get your chicken out from the fridge at least 30 minutes before you’re going to roast it).


Heat your oven to the max (mine goes to 240ºC), pile your marinaded chicken onto the slotted tray and get this into your oven. Remember, the marinade will drip down to the oven floor…. so if you want to avoid a mess later, do put a large piece of foil on the oven floor.


This needs 12-15 minutes. Do keep an eye on the chicken, since each oven has variable cook times to my mind. But your olfactories and a visual check will surely tell you when it’s done. I tend to do this about 15 mins, which cooks the chicken fully, but I still turn the chicken around and put back in the oven for 3 minutes to brown the undersides.


That’s it. The Tandoori Chicken is ready!
(yes, that’s a copy of Bombay Times to make mopping up easier!)

STEP 2 :: Getting the curry right!


Get hold of the thickest karai (or wok), and heat the 3tbsp oil. If you’re using butter, add at this stage. Once the oil is hot, add the onions, chopped garlic and ginger. After about a couple of minutes add all your dry masalas (chilly powder, dhania powder, garam masala, salt). Once the onions have softened, add the blanched/diced tomatoes as well as the tomato puree. 


Let this onion/tomato mix cook on a medium flame and stir once in a while to keep things centered in your kadai.


You will find the oil will separate in about 10 minutes. At this stage move your onion tomato mix to a food blender (get this into a big jar). Add the rest of the curd and for good measure if you’ve saved up the leftover marinade add that to the jar as well. Pulse your blender a few times and you will get an orange color, thick and consistent paste in your blender jar.


Move all this back to your kadai now and let the blended curry cook on a medium heat for another 10 minutes. This takes care of the rawness of the curd and marinade. Add the slit green chillies, sugar, vinegar and cream (if you’re using) as well. Depending on how I want to adjust the taste, sometime I add a couple of spoons of ketchup too.


Here’s what your dish should be looking like at this time.


To this, depending on the consistency you want, please add water (in small quantities each time so you don’t cause the dish to flood).


Once you’re happy with the taste of this curry, simply take all your tandoori chicken and put into the kadai and gently envelope the chicken with the curry. Remember – the chicken is already cooked – so you’re only finishing off now. You can let this blended chicken cook for another 4-5 minutes.


Here’s your butter chicken at this stage – 


Now, the final flourish – and again actually this is optional. We love kasuri methi in our chicken – so here it is after you throw in the handful! Gorgeous, no?


Blend the fenugreek in gently and let this cook for another 5 minutes after.


That’s it, you’re done!


Add some sliced chilly and/or ginger strips to garnish if you like. A dollop of butter, or some cream atop this dish always adds a bit of glam!


Big Tip! Eat the next day!! My experience, and that of many around me, is that many many meat dishes improve dramatically if eaten the next day! 

A good reason to eat breakfast.


This is my breakfast comfort food.

I really can’t recall where or when exactly I picked a recipe for these Moroccan Eggs, but I’ve been making these for something like 8 or 10 years now. The blandest description I saw was eggs poached in tomato ragout. Accurate, but entirely unappealing!

If you do google up moroccan eggs, you get a dozen results that are all quite close to this recipe. And apparently variations of this dish are popular in Israel Tunisia and Turkey as well. And each of these have interesting variations – with bell peppers, harissa and cheese included in the recipes.

The thing that will strike you, as it does anyone who tastes this, is how the flavor is so Indian. Spicy, based on tomato and onions that are the staple of so many of our curries, and cumin at the heart of the flavors.

This takes about 20 mins from start to finish. And serves feeds a couple that has had a busy saturday morning (yes, like we had today!)

2 onions sliced – i prefer thick slices as you can see in the finished dish above.
3 tomatoes – sliced, again thickly – pick the ripest tomatoes in your kitchen
3-4 pods garlic – roughly chopped
A couple of green chillies – each cut into 4 or 5 pieces
Red Chilly powder (1 tsp)
Zeera or Cumin powder (1 tsp, and another 1/2 tsp)
Salt to taste
4 eggs – best if they have been out of the fridge for a while.
And some olive oil of course.

Heat a couple of tbsp of olive oil in a 6″ or 8″ skillet (the one in the photo above is an 8″). Saute the onions and garlic together for about 4 minutes till they are translucent and soft. Keep the heat medium so you don’t end up browning or burning these up. Next, in go the tomato slices. Move them around to blend them with the (now cooked) onions and make sure that the onions aren’t buried under the tomato slices. 

This is the time to add the salt, red chilly powder (or use paprika if you want things lighter), the cumin powder (1tsp) and the salt and the green chilly.

Now just stir once in a while and let the whole tomato-onion mix combine and cook out. If things are starting to dry out, you know that the heat is too high! Remember, keep the heat medium to low, and move your tomato-onion mix around – without breaking up the pieces. In about 7-8 minutes (may be a couple of mins longer with more raw or green tomatoes), you should see the tomatoes fully cooked out, and moist and a saucy, oily separation to the sides of the pan.

Make four ‘indents’ within the mix in the pan now and break one egg into each indent. Use a fork if you need to spread the whites of the egg around the pan, and let the eggs cook inside this mix for a minute. Sprinkle some more salt, little red chilly powder and the rest of the cumin powder onto the eggs, and cover for the last couple of minutes. The covered pan allows the soft egg whites right on top to cook and settle down.

Open pan, throw in some coriander leaves and serve with toasted bread, pao, or (as I did) last night’s garlic toast from Hard Rock Cafe’!


This rustic mix of the eggs and the tomato-onion mix makes for a hearty breakfast, and its one of those simple dishes that makes you scrape the pan with your last bits of bread!

Try this out and write to me. Its quick and simple to rustle up, and a delight to eat!

The variations I mentioned before? I will try out and revise this post soon; but they involve including some red or yellow peppers into the tomato mix, and one  variations ends with some cheese chunks to be placed in the pan before the end.Worth a shot!